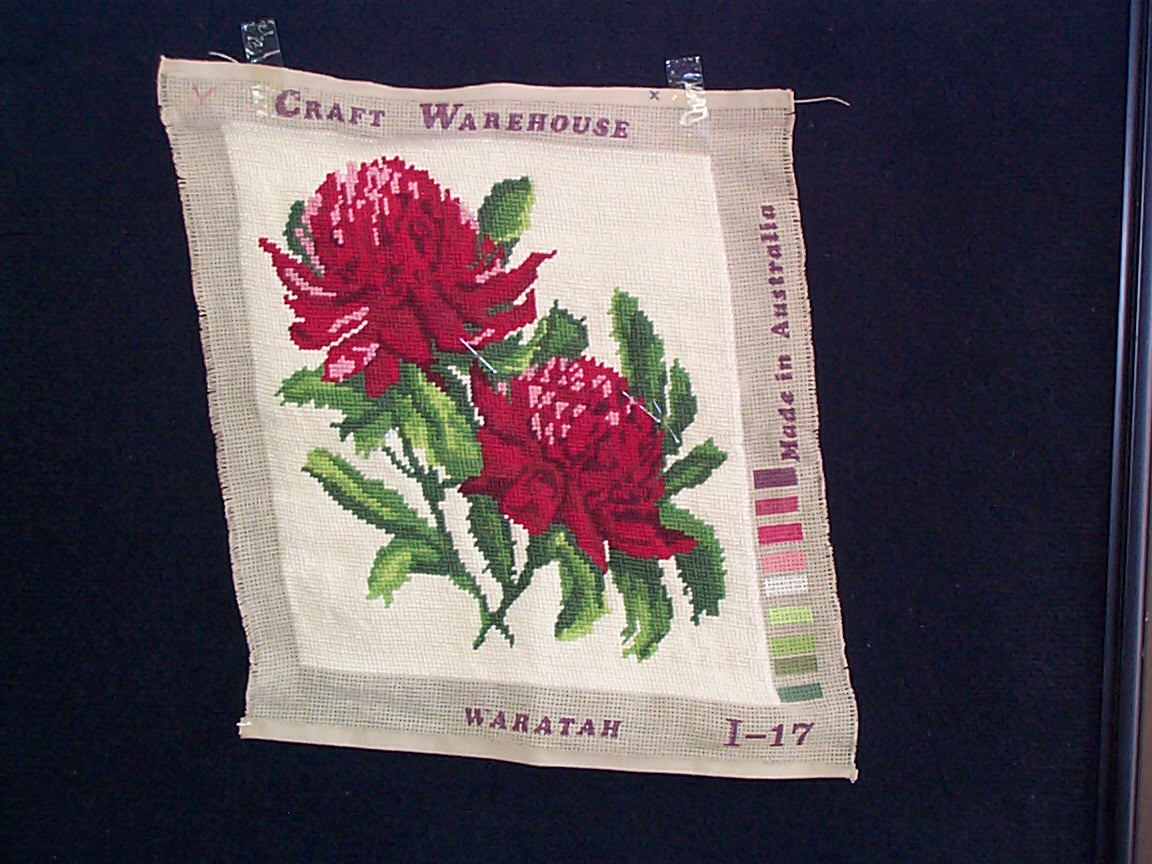
Over the years we’ve framed countless cross stitches and embroideries. But this one was in particularly bad shape. The owner was desperate, she’d been unable to find anyone willing to take on this complicated job. We thought we could not only frame it, but straighten it as well.
In a perfect world cross stitches and embroideries would be blemish and wrinkle free; ready for framing. However, with the amount of time we invest in these works of art, it’s rare for them to be stain and dust free.
Unfortunately most tapestries that are brought in for stretching and framing are a little worse for wear. Dropped stitches, animal hairs, rust stains (only ever use stainless steel needles and pins!) . The constant pushing, pulling and twisting of the fabric whilst we work can warp the fabric structure. Embroidery hoops and stretcher frames can help minimise this allowing your stitches to be taught but they also can leave marks and creases.
This one fell into the worst category. But with a little time, technology and TLC we were able to whip it back into shape.
Getting rid of the warp
Our first issue was getting rid of the ‘kink’. The fabric had warped from a square to a diamond. This took time, but by the end of the week we had a square cross stitch again. Once we had the fabric back into it’s original shape we were able to stretch and pin it in place (stainless steel pins only, anything else and you risk damaging your work).
Stretching and pinning a cross stitch
Pinning a cross stitch correctly is a time consuming job. The fabric needs to be taut, but not tight. The image has to be centred and straight (both vertically and horizontally). Firstly we centre the image, then we work a little on each side, going backwards and forwards until we’re happy that the cross stitch is taut and straight.

Framing the cross stitch
Once pinned we can get onto the framing. The style of frame reflects the style of the work, traditional, classic, and by using 2 matts, in two shades of green. We were able to highlight the work, and keep it ‘light’ and illuminated without overwhelming the work. If we’d used darker colours the mood would have been heightened but you’d be less able to see the intricacies of the stitches.
Framed cross stitch
Finally, after working on the cross stitch for a few weeks it was finished. The twisted and warped fabric was now framed and waiting for collection. Needless to say our customer was ecstatic, and so were we. We love a happy customer!
If you’re wanting to buy a cross stitch or embroidery project, try the following suppliers:
And when you’re ready bring, it into Fastframe for framing!